Cloud Pro — Setup Guide
Velora Cloud Pro runs in the cloud — no desktop to keep running, no device dependency. Connect your WhatsApp groups once, and Velora monitors them around the clock, surfacing structured reports, AI follow-ups, and cross-site insights automatically.
Time to set up: 2 to 3 minutes (after your account is activated)
Cloud Pro is currently available by arrangement. To get started, book a demo with our team — we'll walk you through the product, work through the details, and activate your account once you're ready to proceed.
This guide picks up from there: once your account is activated, here's how to complete setup.
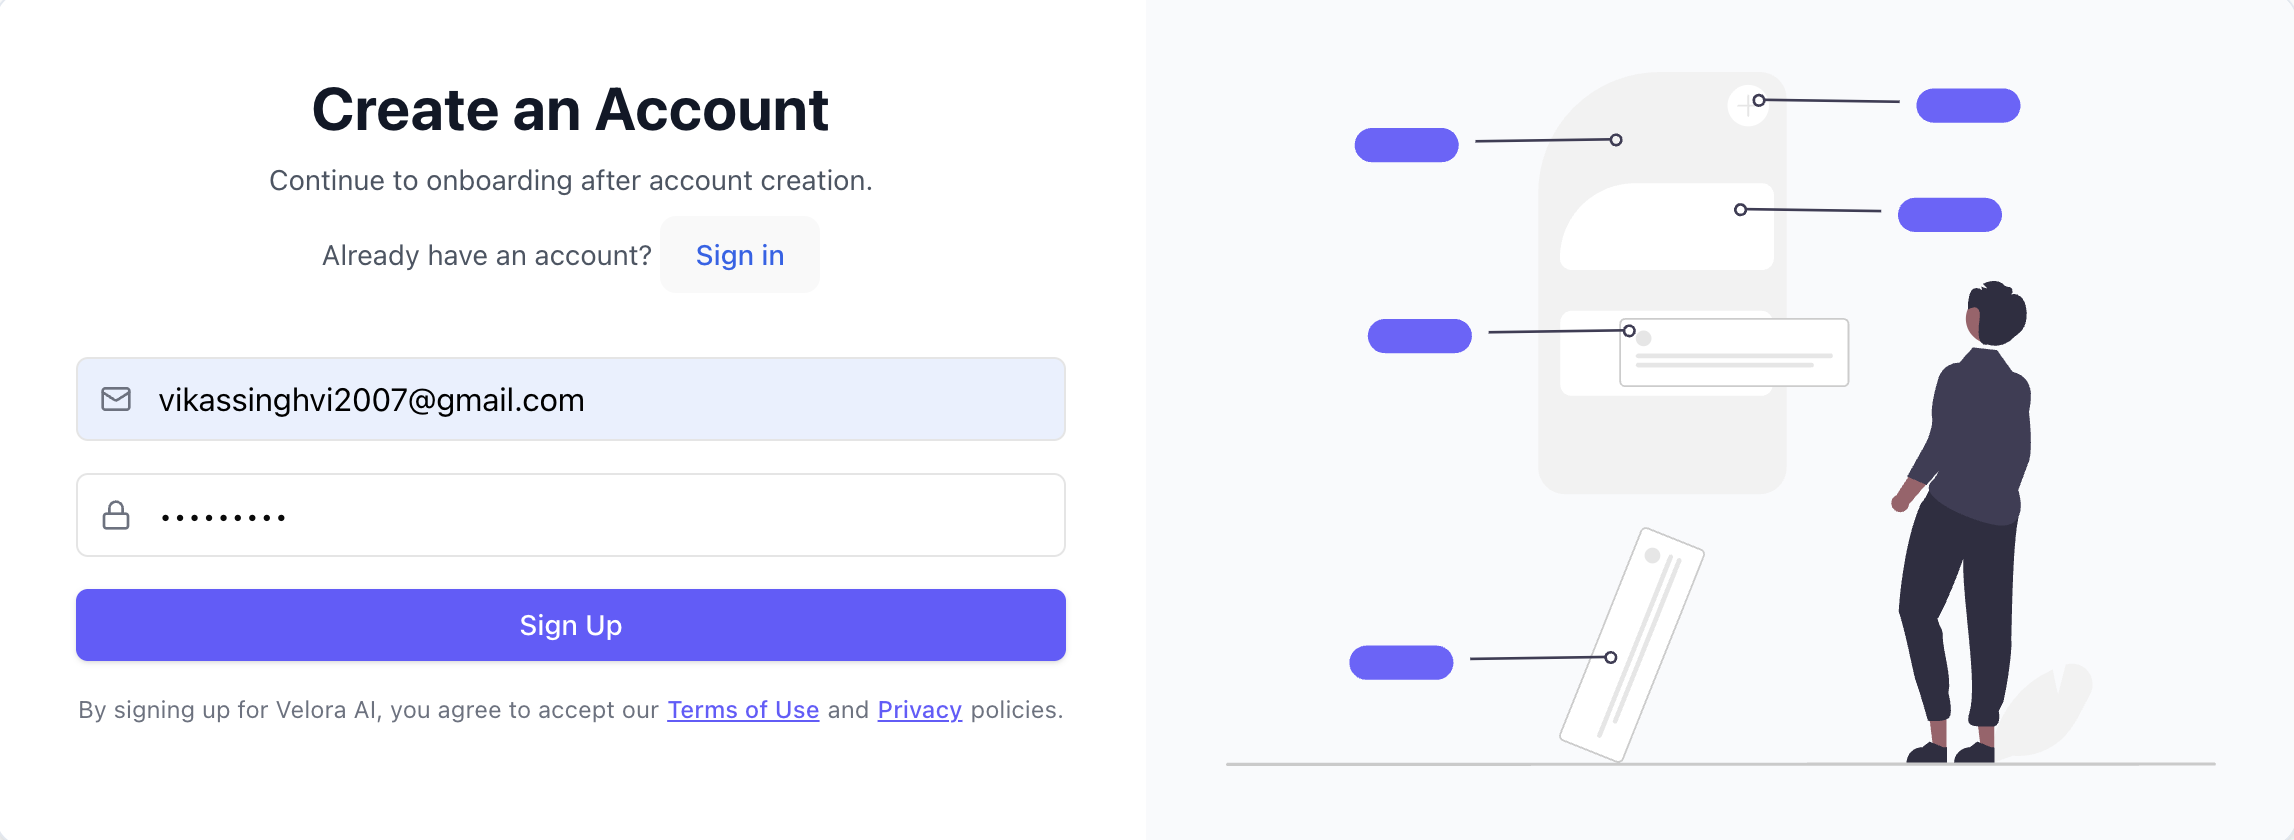
Step 1 — Create your account
Once your account is activated, you'll be able to sign in to Velora Cloud Pro. If you registered with an email and password, you can sign up directly on this screen. You can also use Sign in with Google — which creates your account automatically if you don't have one.
Step 2 — Confirm your email
After signing up, Velora will send a confirmation email to the address you registered with. Open that email and click the confirmation link.
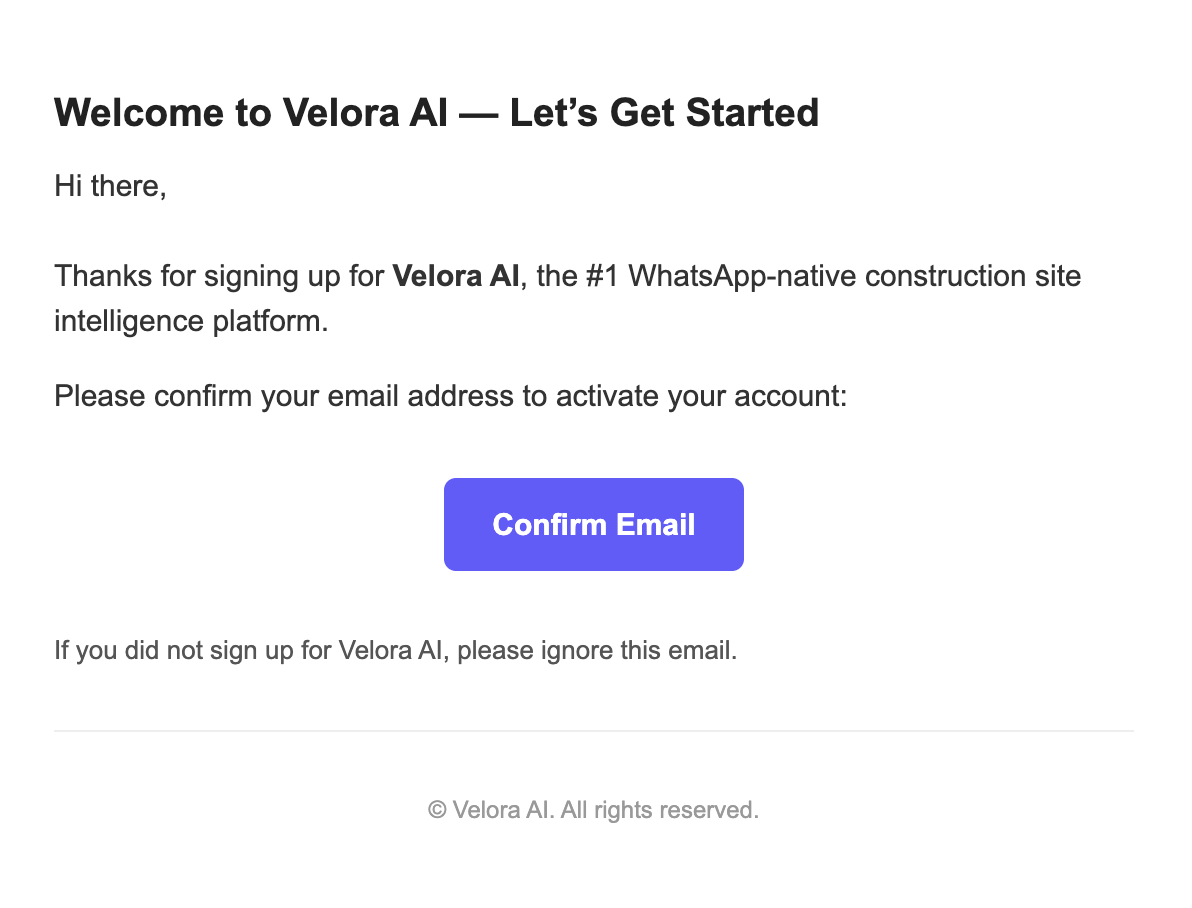
If you used Sign in with Google, you'll still receive a confirmation email — check your inbox and confirm before signing in.
Step 3 — Sign in
Once your email is confirmed, you'll land back on the sign-in screen. Enter your credentials (or use Google) to continue into the app.

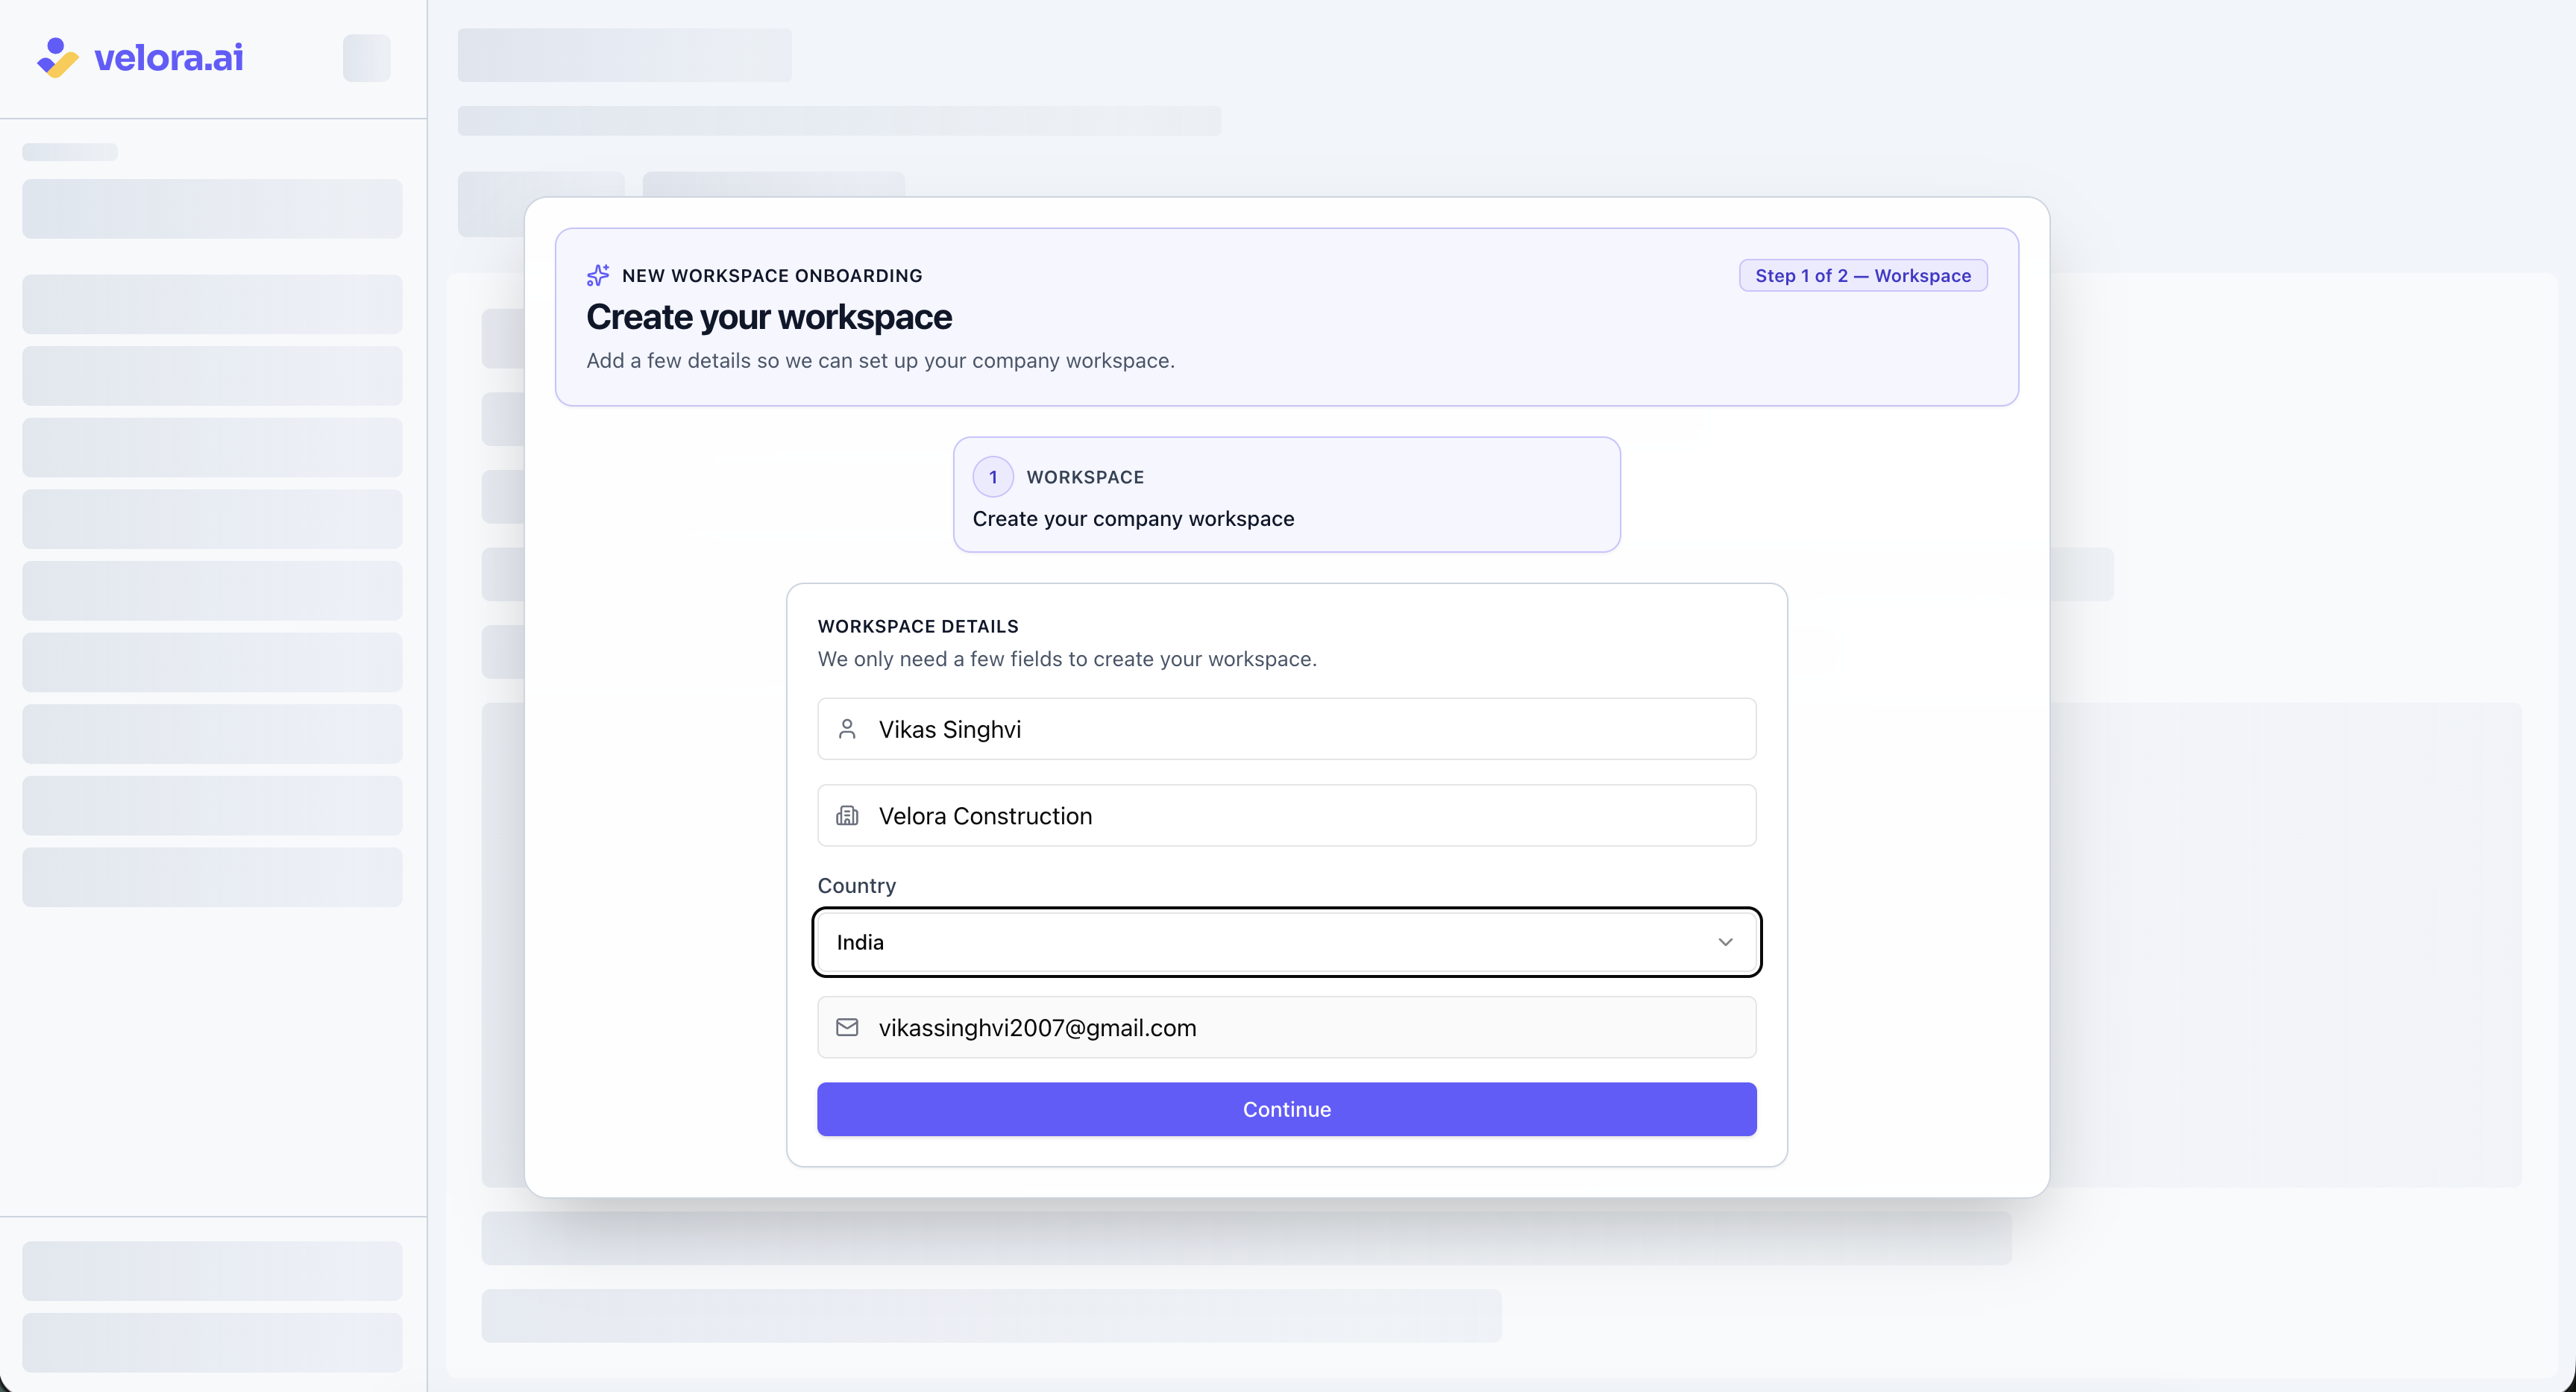
Step 4 — Create your workspace
On first login, Velora will walk you through creating your company workspace. This is the control plane for your organisation — it manages your subscription, team member access, AI settings, and WhatsApp connections.
Enter your company name and any required details, then click Create Workspace.
Step 5 — Connect your WhatsApp
To connect Velora with WhatsApp, scan the QR code — scan it from the WhatsApp account you use for your site groups.
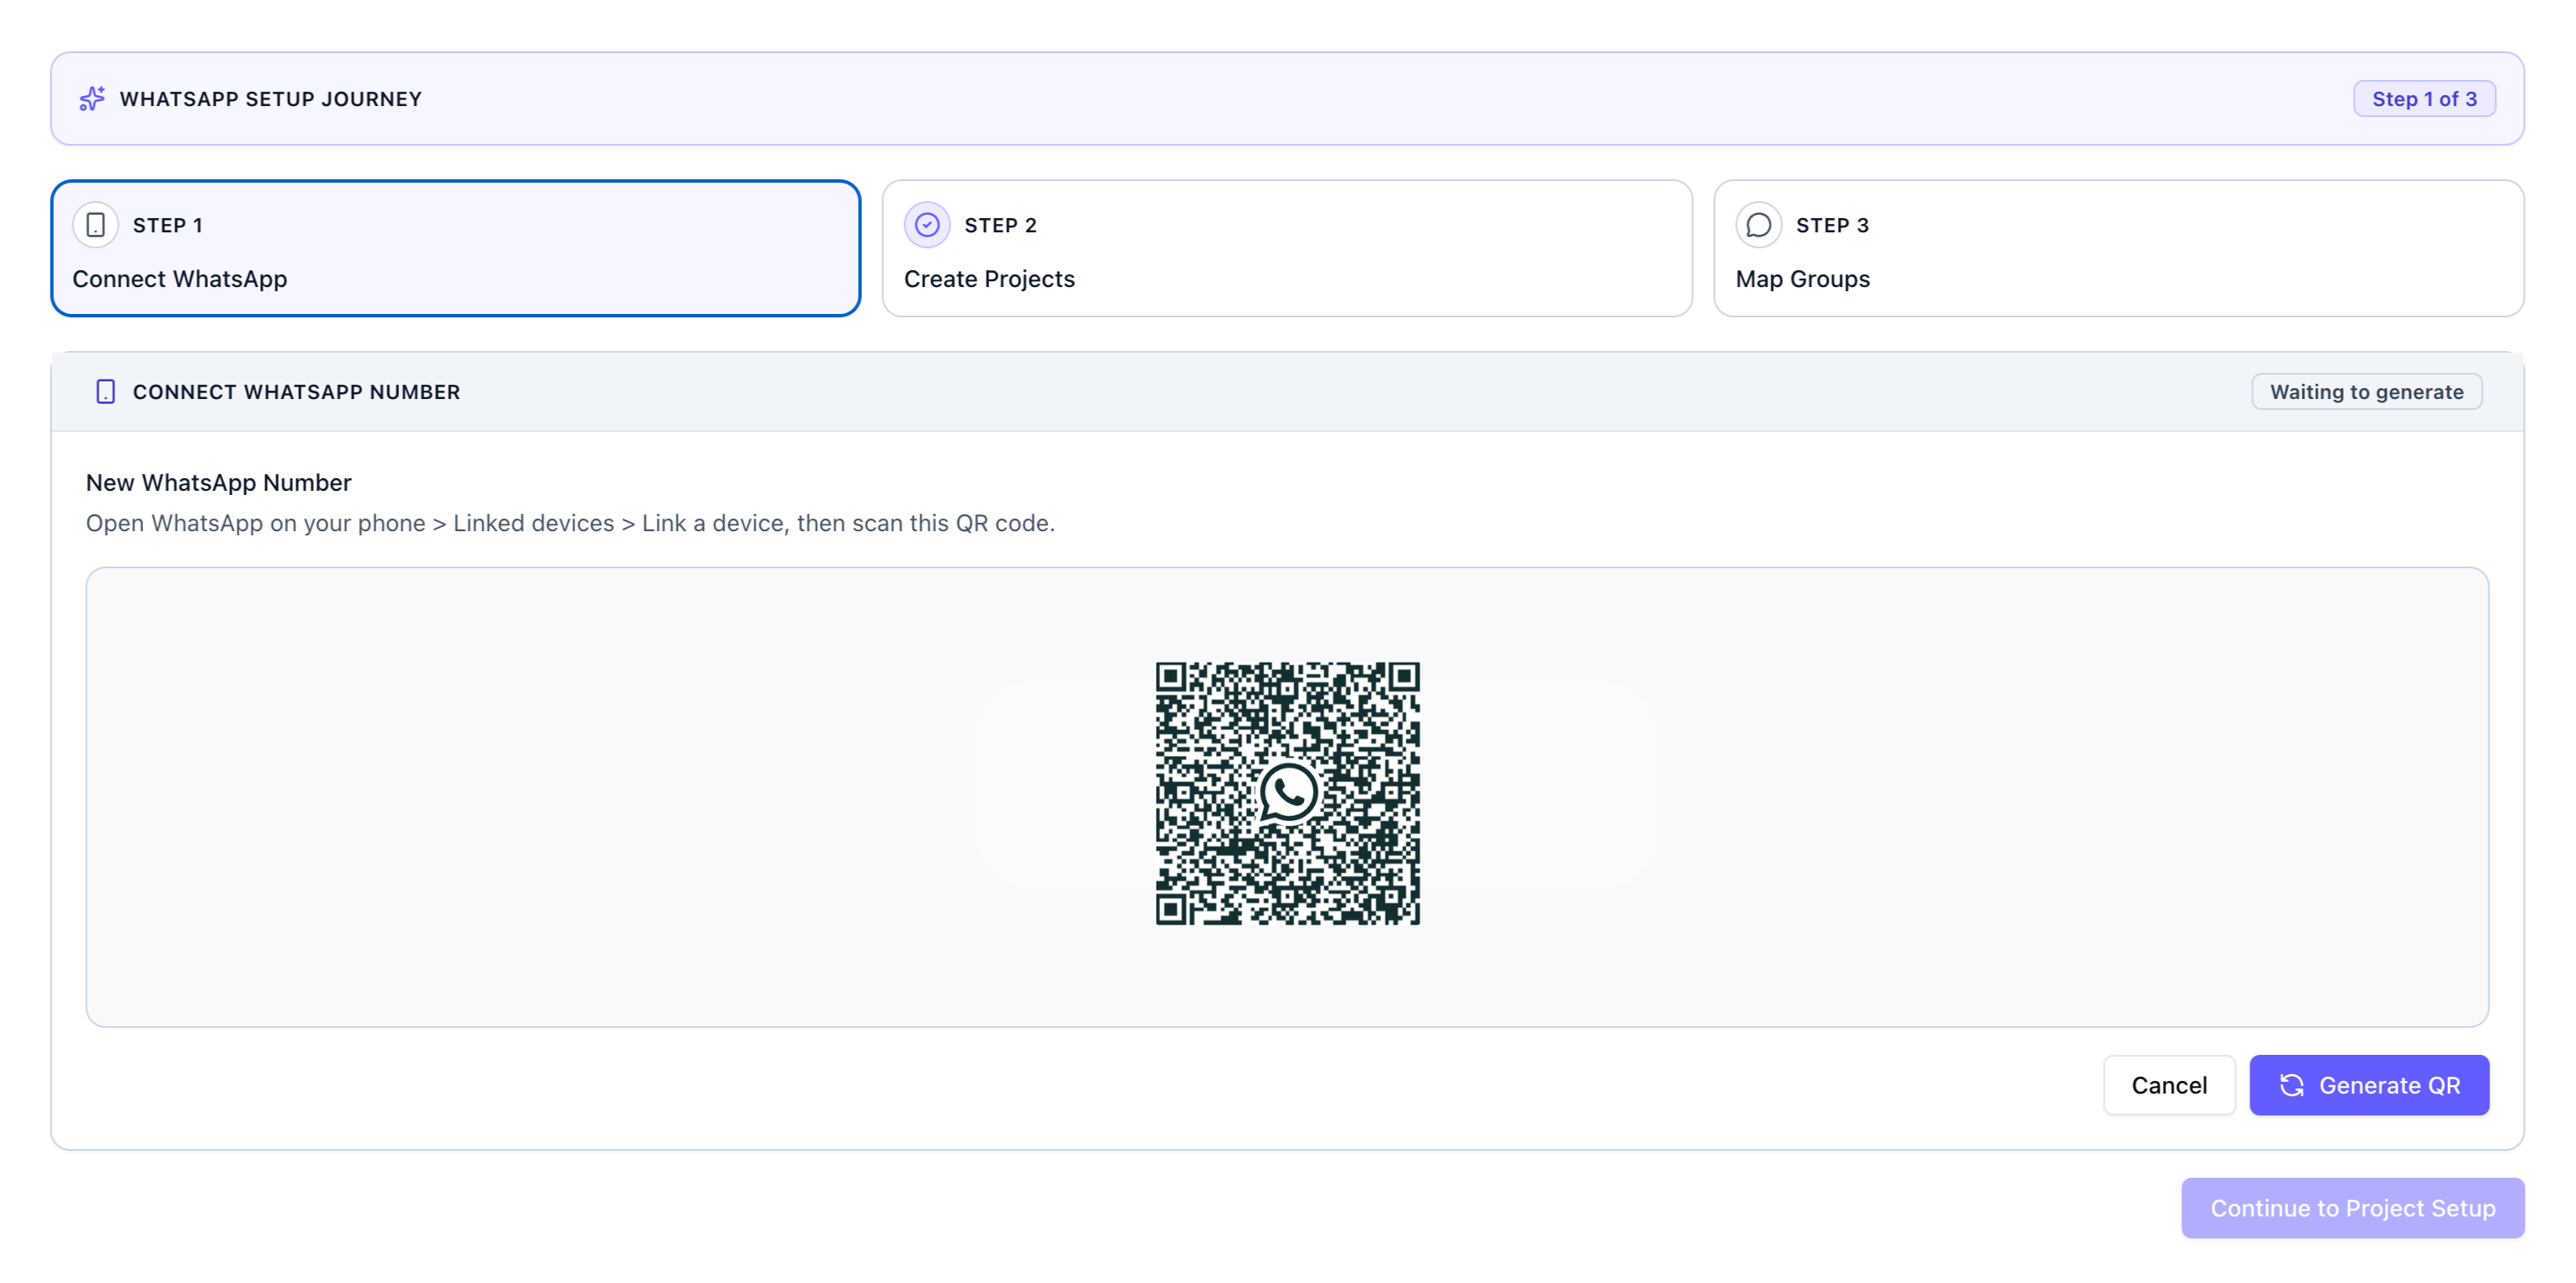
To scan the QR code, open WhatsApp on your phone and navigate to Linked Devices:
- Android: Tap the ⋮ menu → Linked Devices → Link a Device
- iPhone: Tap Settings → Linked Devices → Link a Device
Point your phone's camera at the QR code. Once connected, Velora will confirm the link and move you forward.
The QR code refreshes every few seconds. If it expires before you scan it, you can click 'Generate QR' to use a new one.
We recommend using a number dedicated to site coordination rather than your personal WhatsApp. Velora only monitors the specific groups you map to projects in step 8 — no other chats are accessed — but a dedicated site number keeps your personal conversations completely separate.
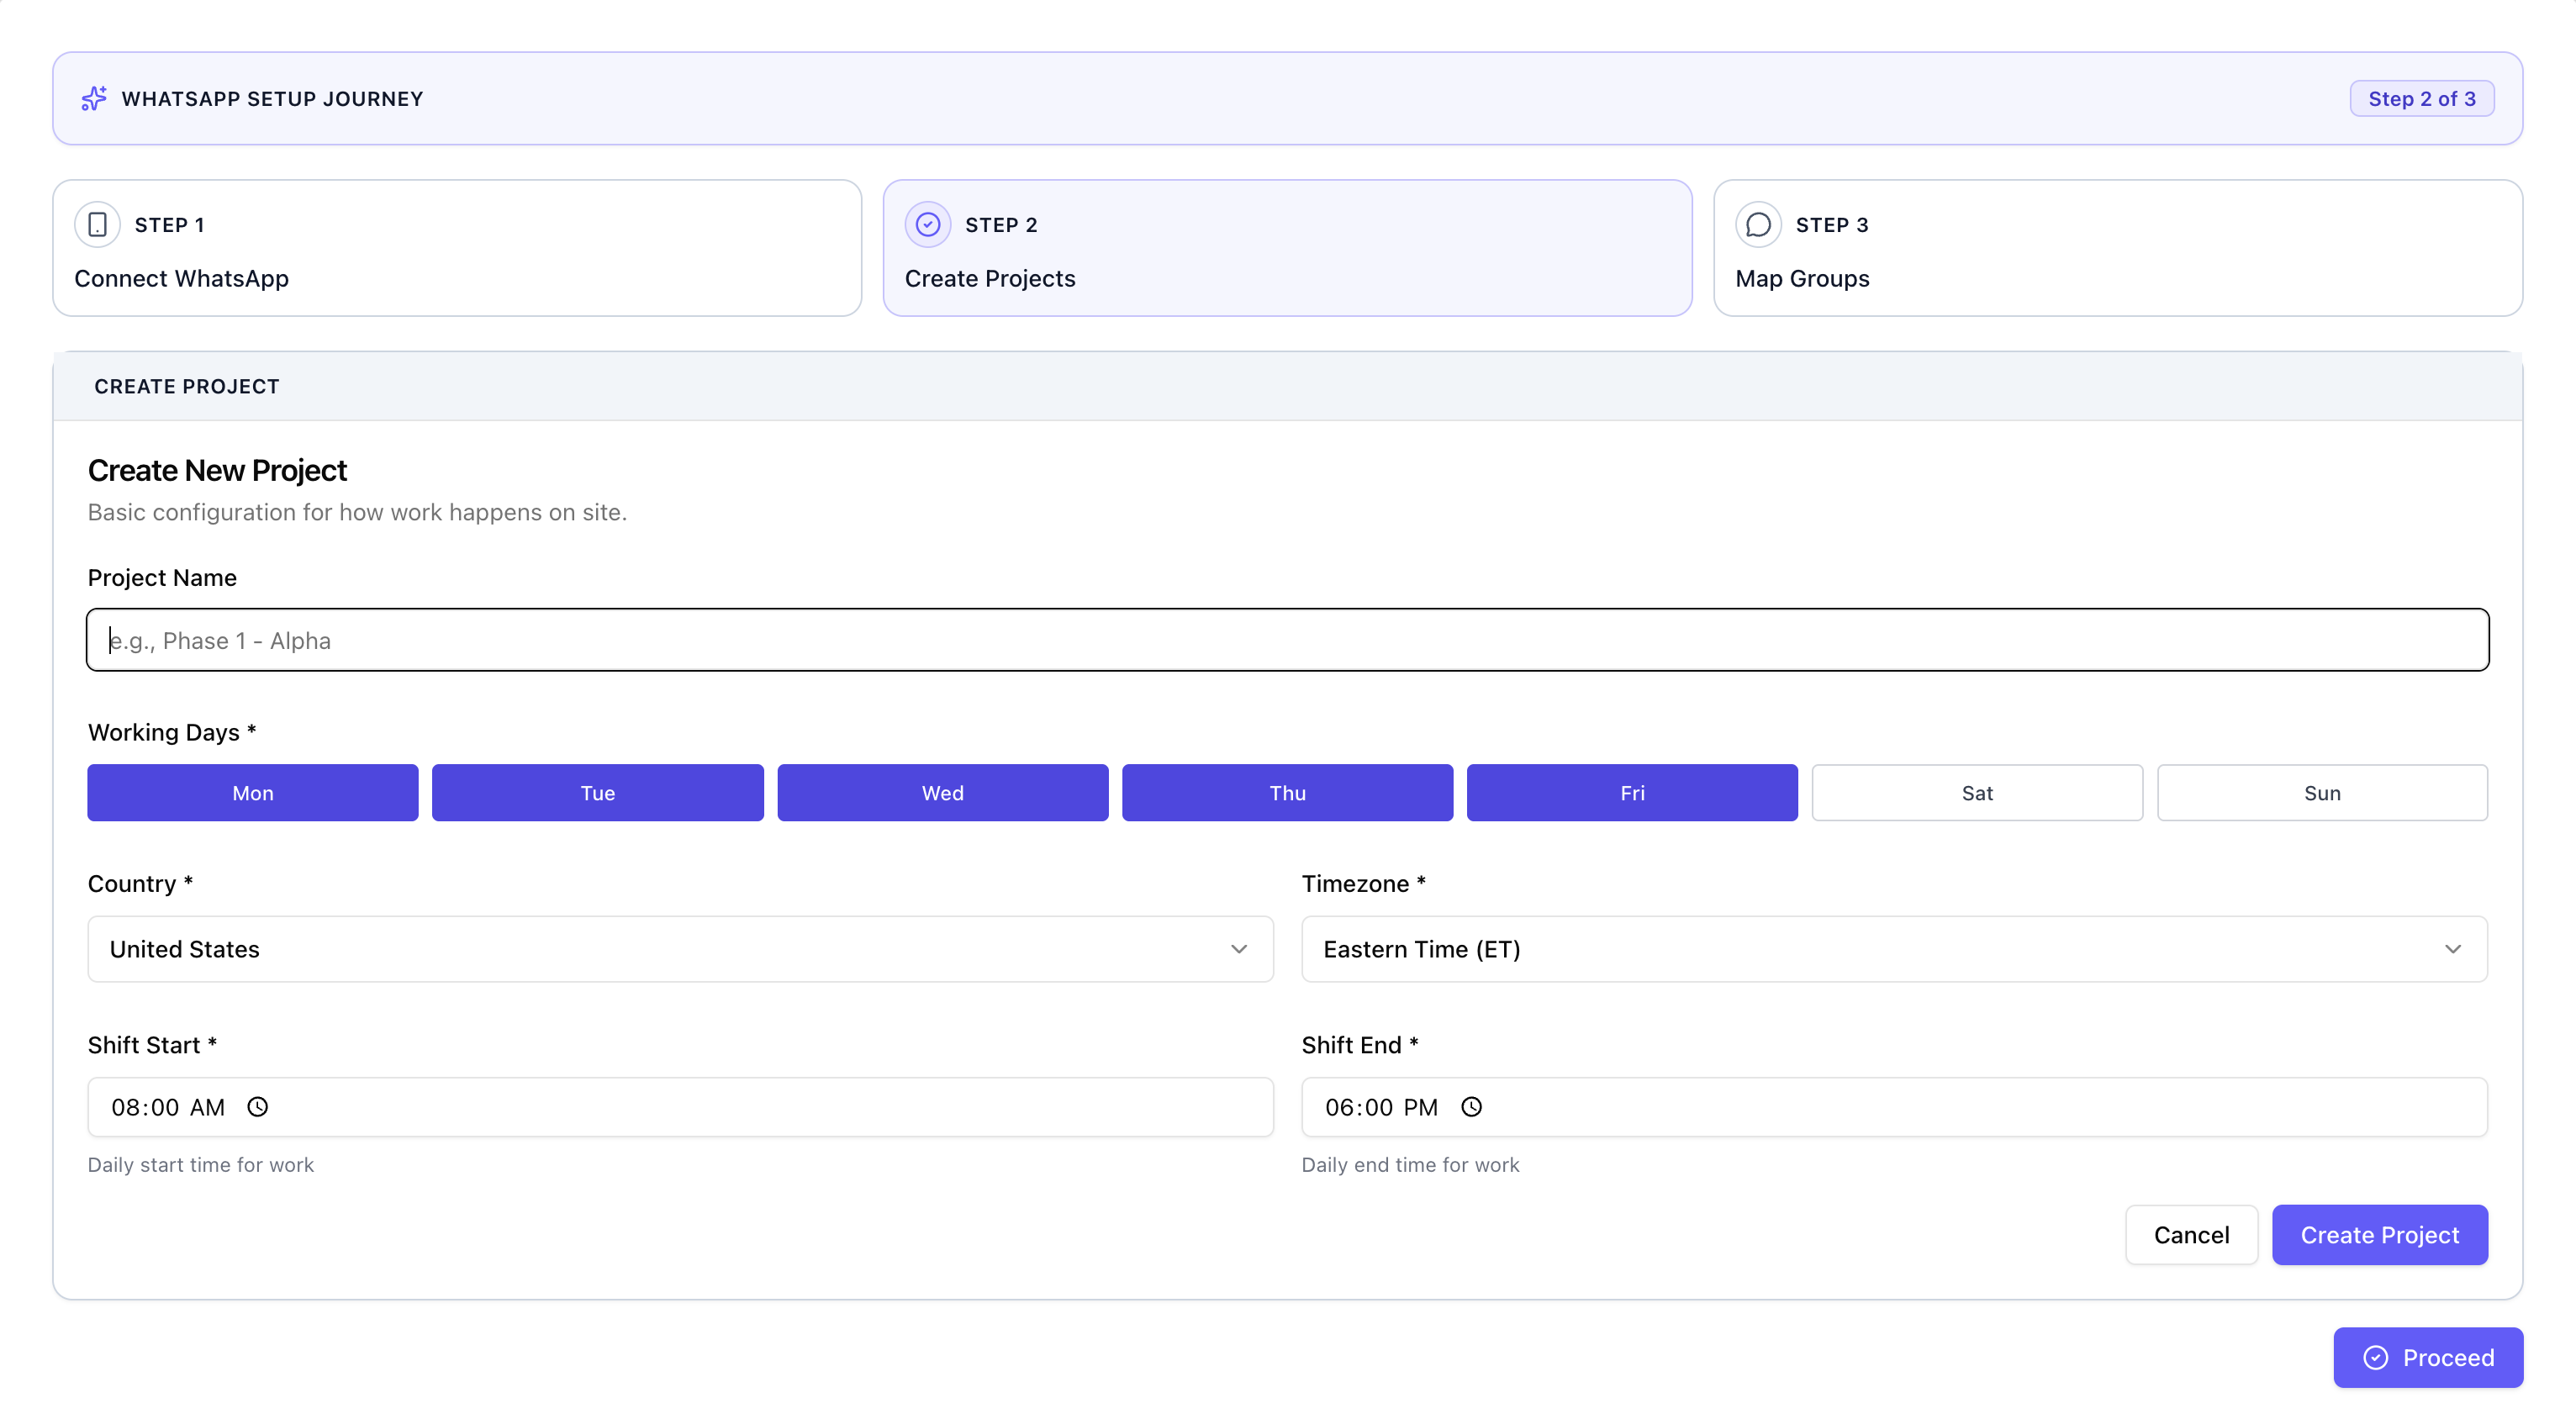
Step 6 — Create your first project
Each project in Velora represents a construction site. Fill in the following details, then click Create Project:
- Project name — use whatever name you refer to this site by internally
- Work days — the days your site operates (e.g. Monday–Saturday)
- Work shift timings — your site's working hours (start and end time)
- Country & timezone — so Velora knows the local time at the site
Velora uses the work days, shift timings, and timezone to ensure AI-generated follow-ups and reminders are only sent during active work hours — your site teams won't receive automated messages outside of their shift.
Step 7 — Add more projects (optional)
If you manage multiple sites, you can add them now. You'll see your first project already listed — click Add Project to create another.
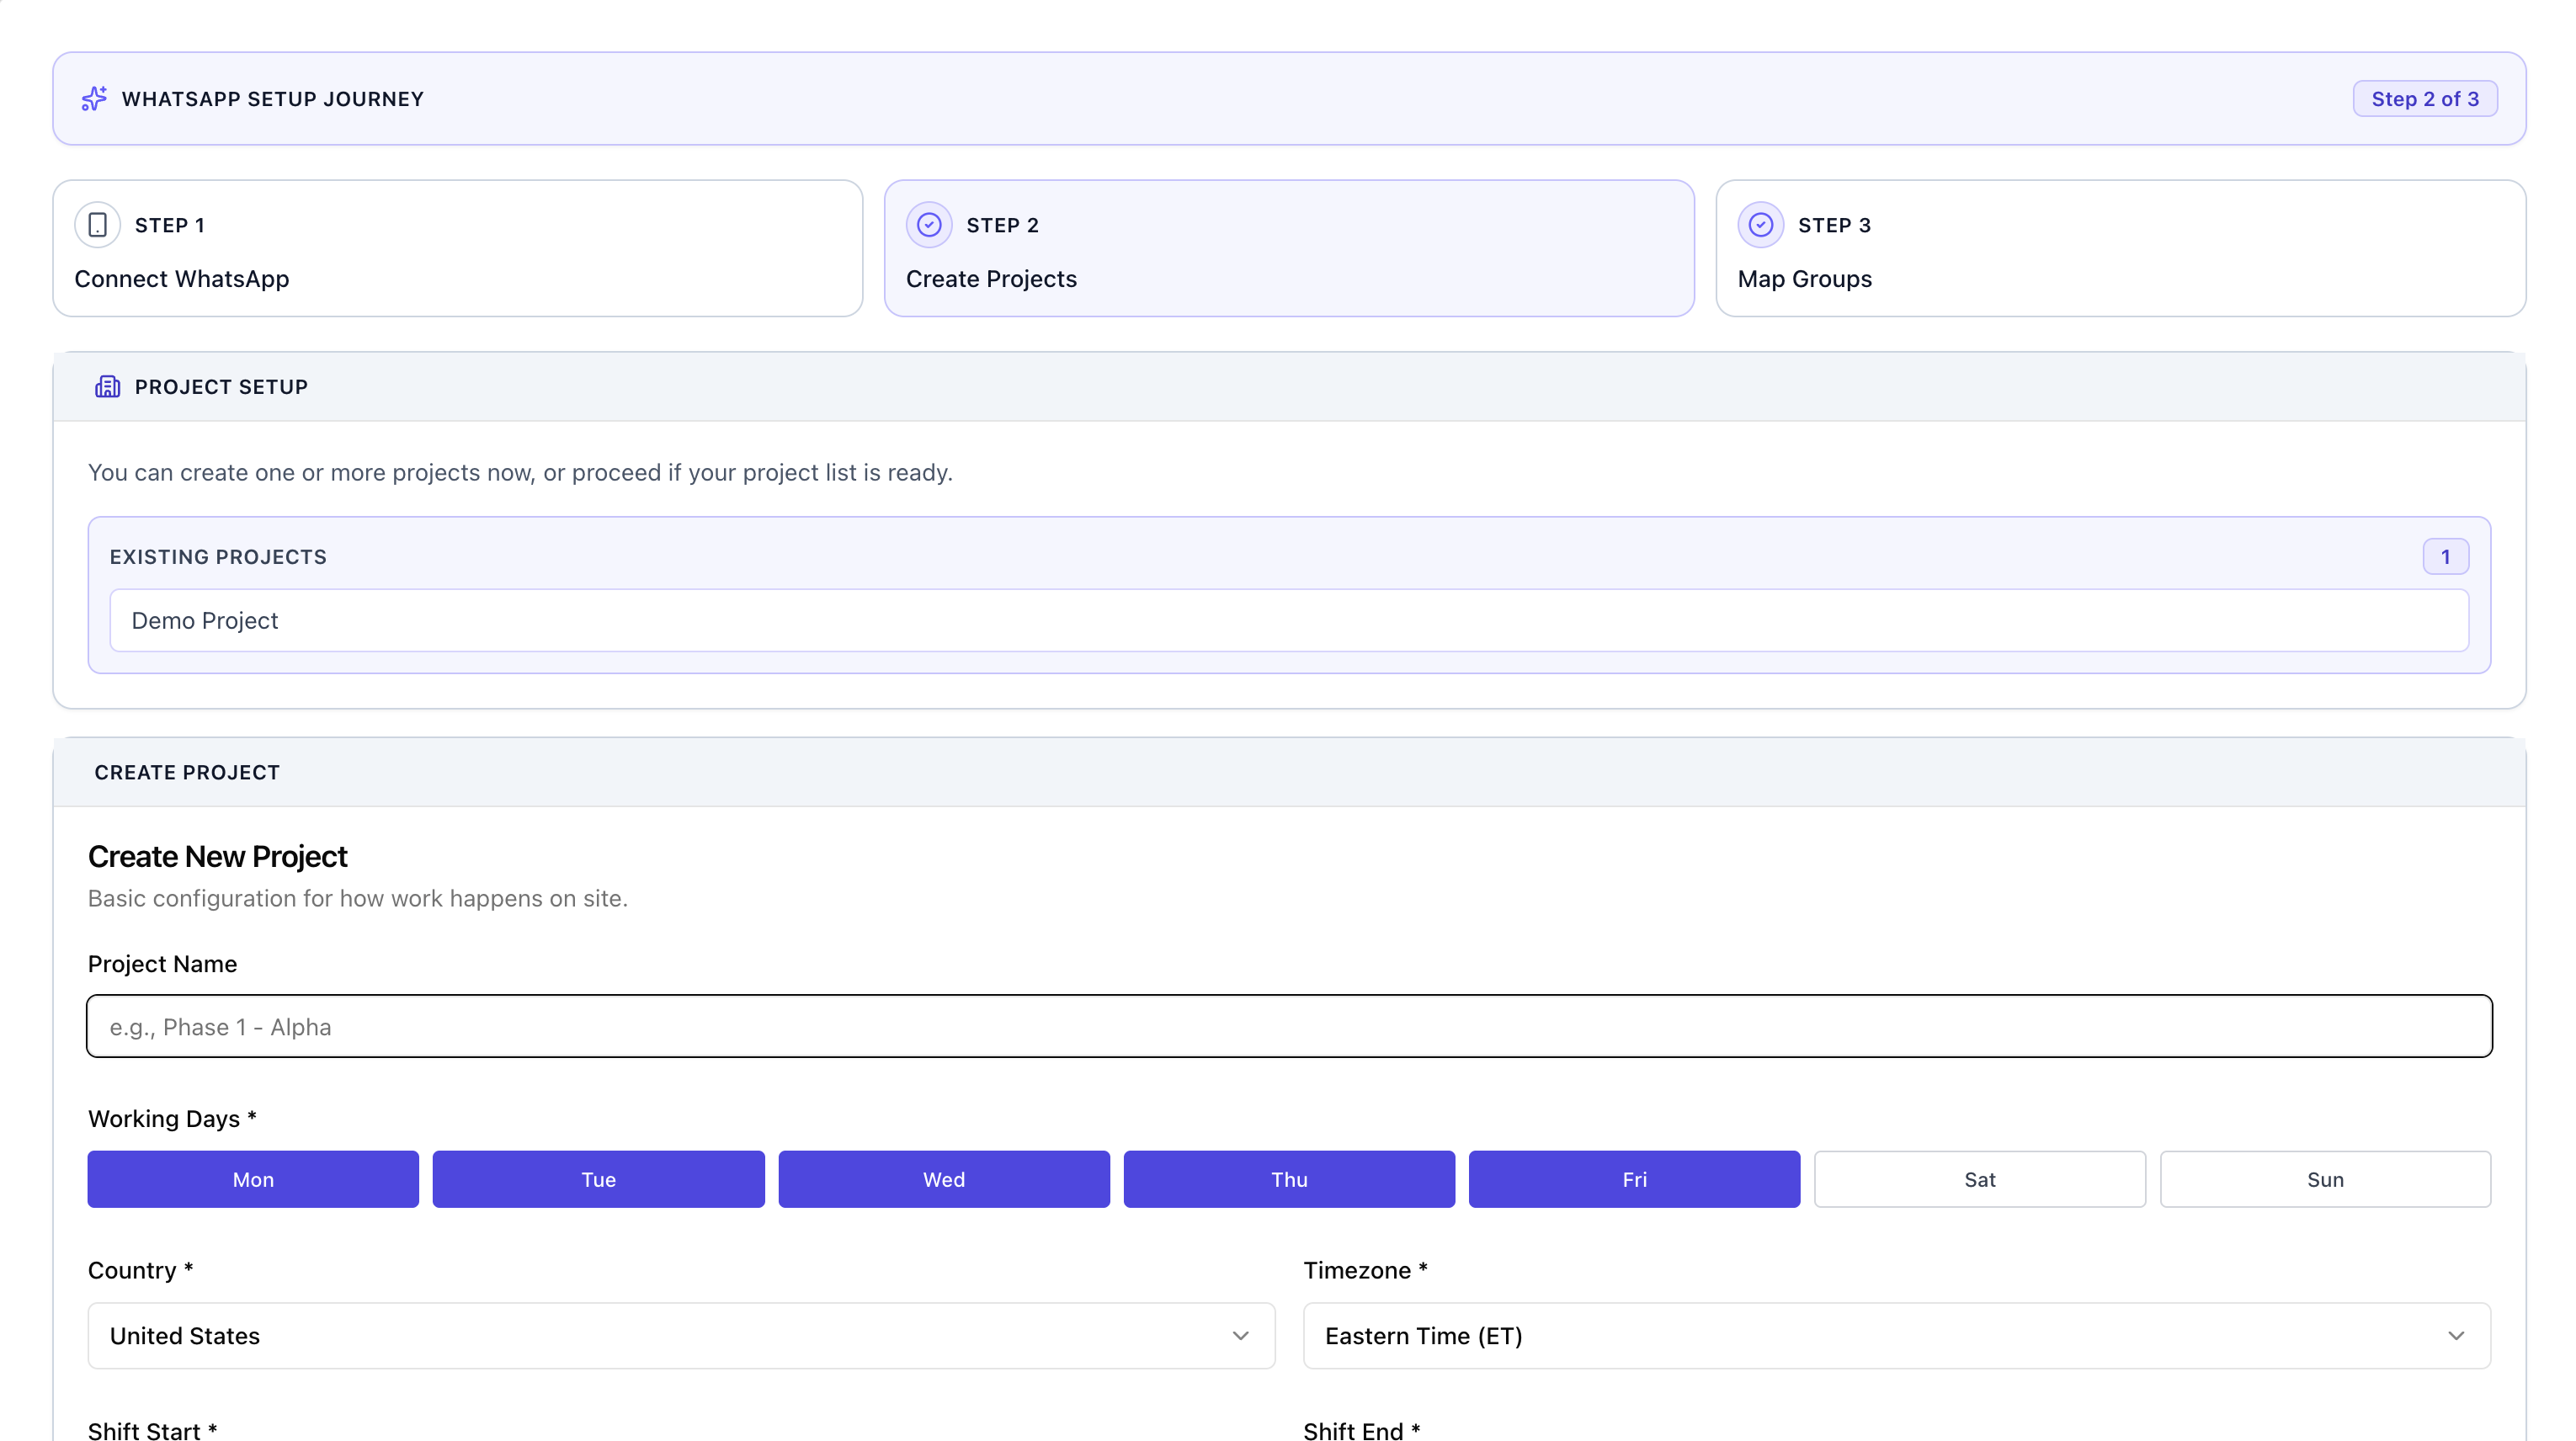
You can always add more projects later from within the app, so don't worry about getting every site in during onboarding.
Step 8 — Map WhatsApp groups to your projects
Select which WhatsApp groups belong to each project. Velora will only monitor the groups you explicitly map — no other chats are accessed.
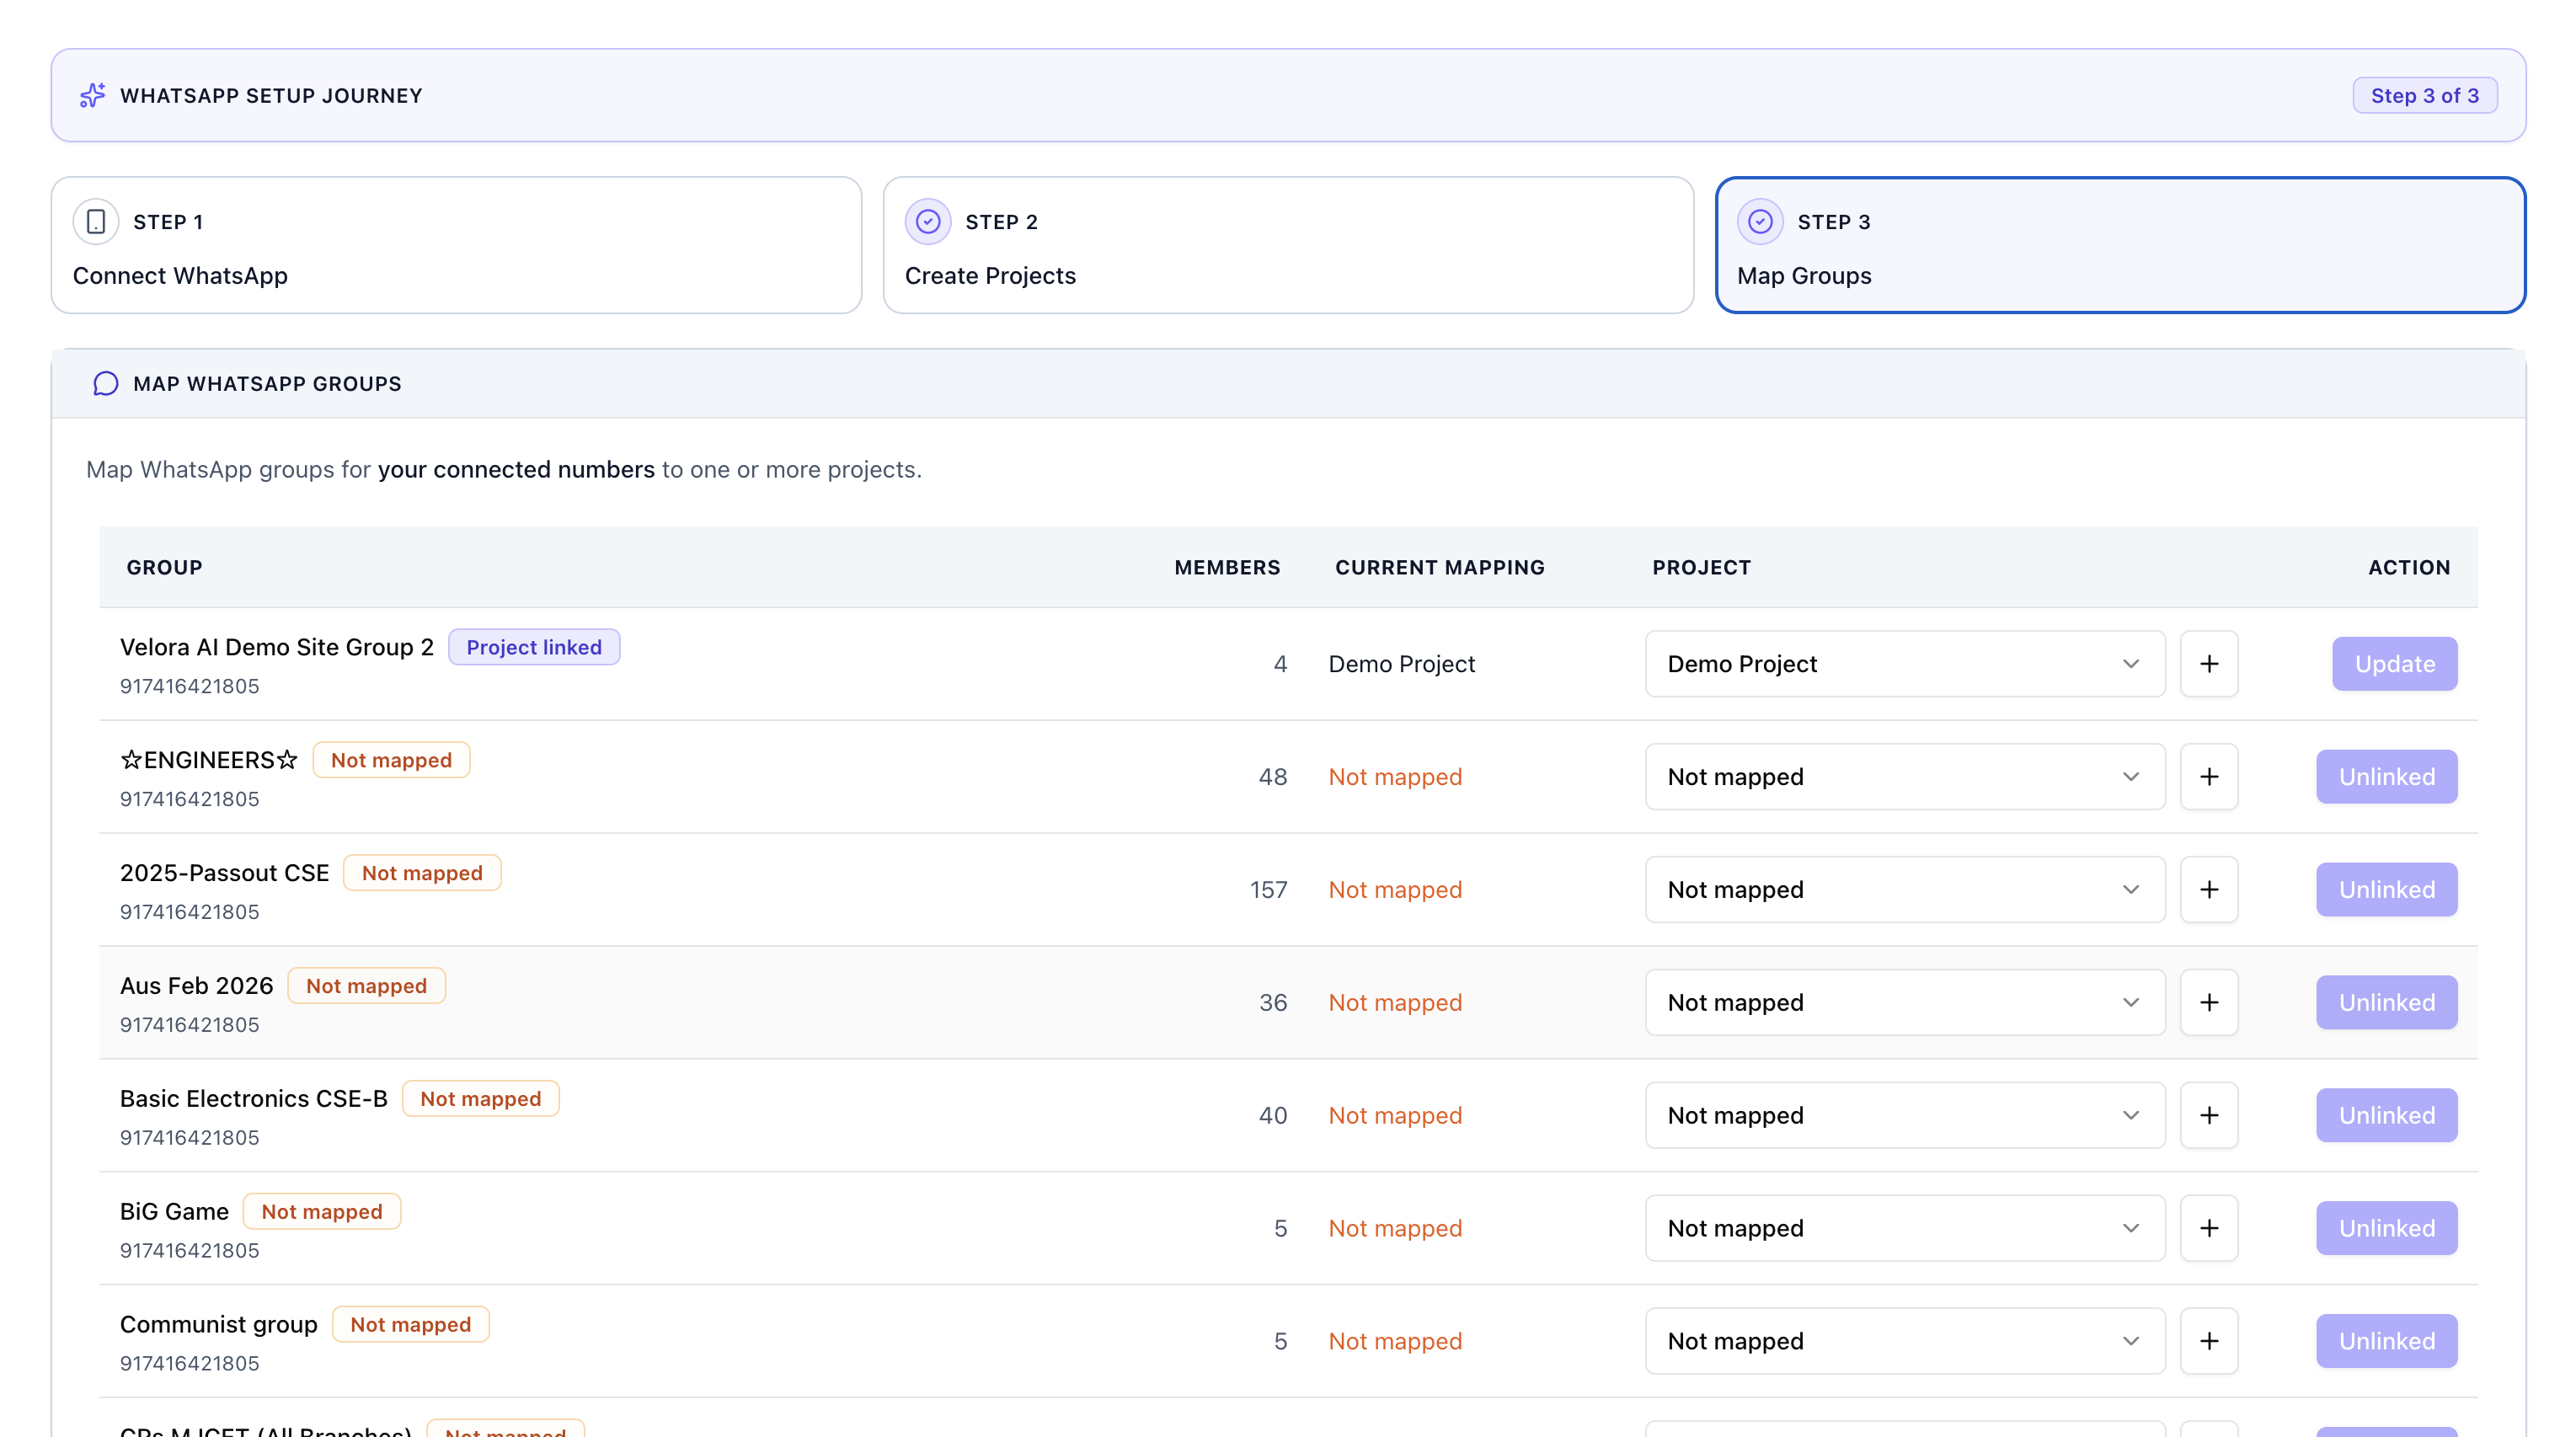
If a site has multiple coordination groups (for example, one for labour and one for supervisors), you can map all of them to the same project.
Choose active groups. Velora builds reports from messages coming in — so pick groups where your team is actively sending updates throughout the day. The more active the groups, the richer the reports.
Once you've mapped your groups, Velora immediately begins monitoring them. Reports, insights, and AI follow-ups start appearing as your teams send updates.
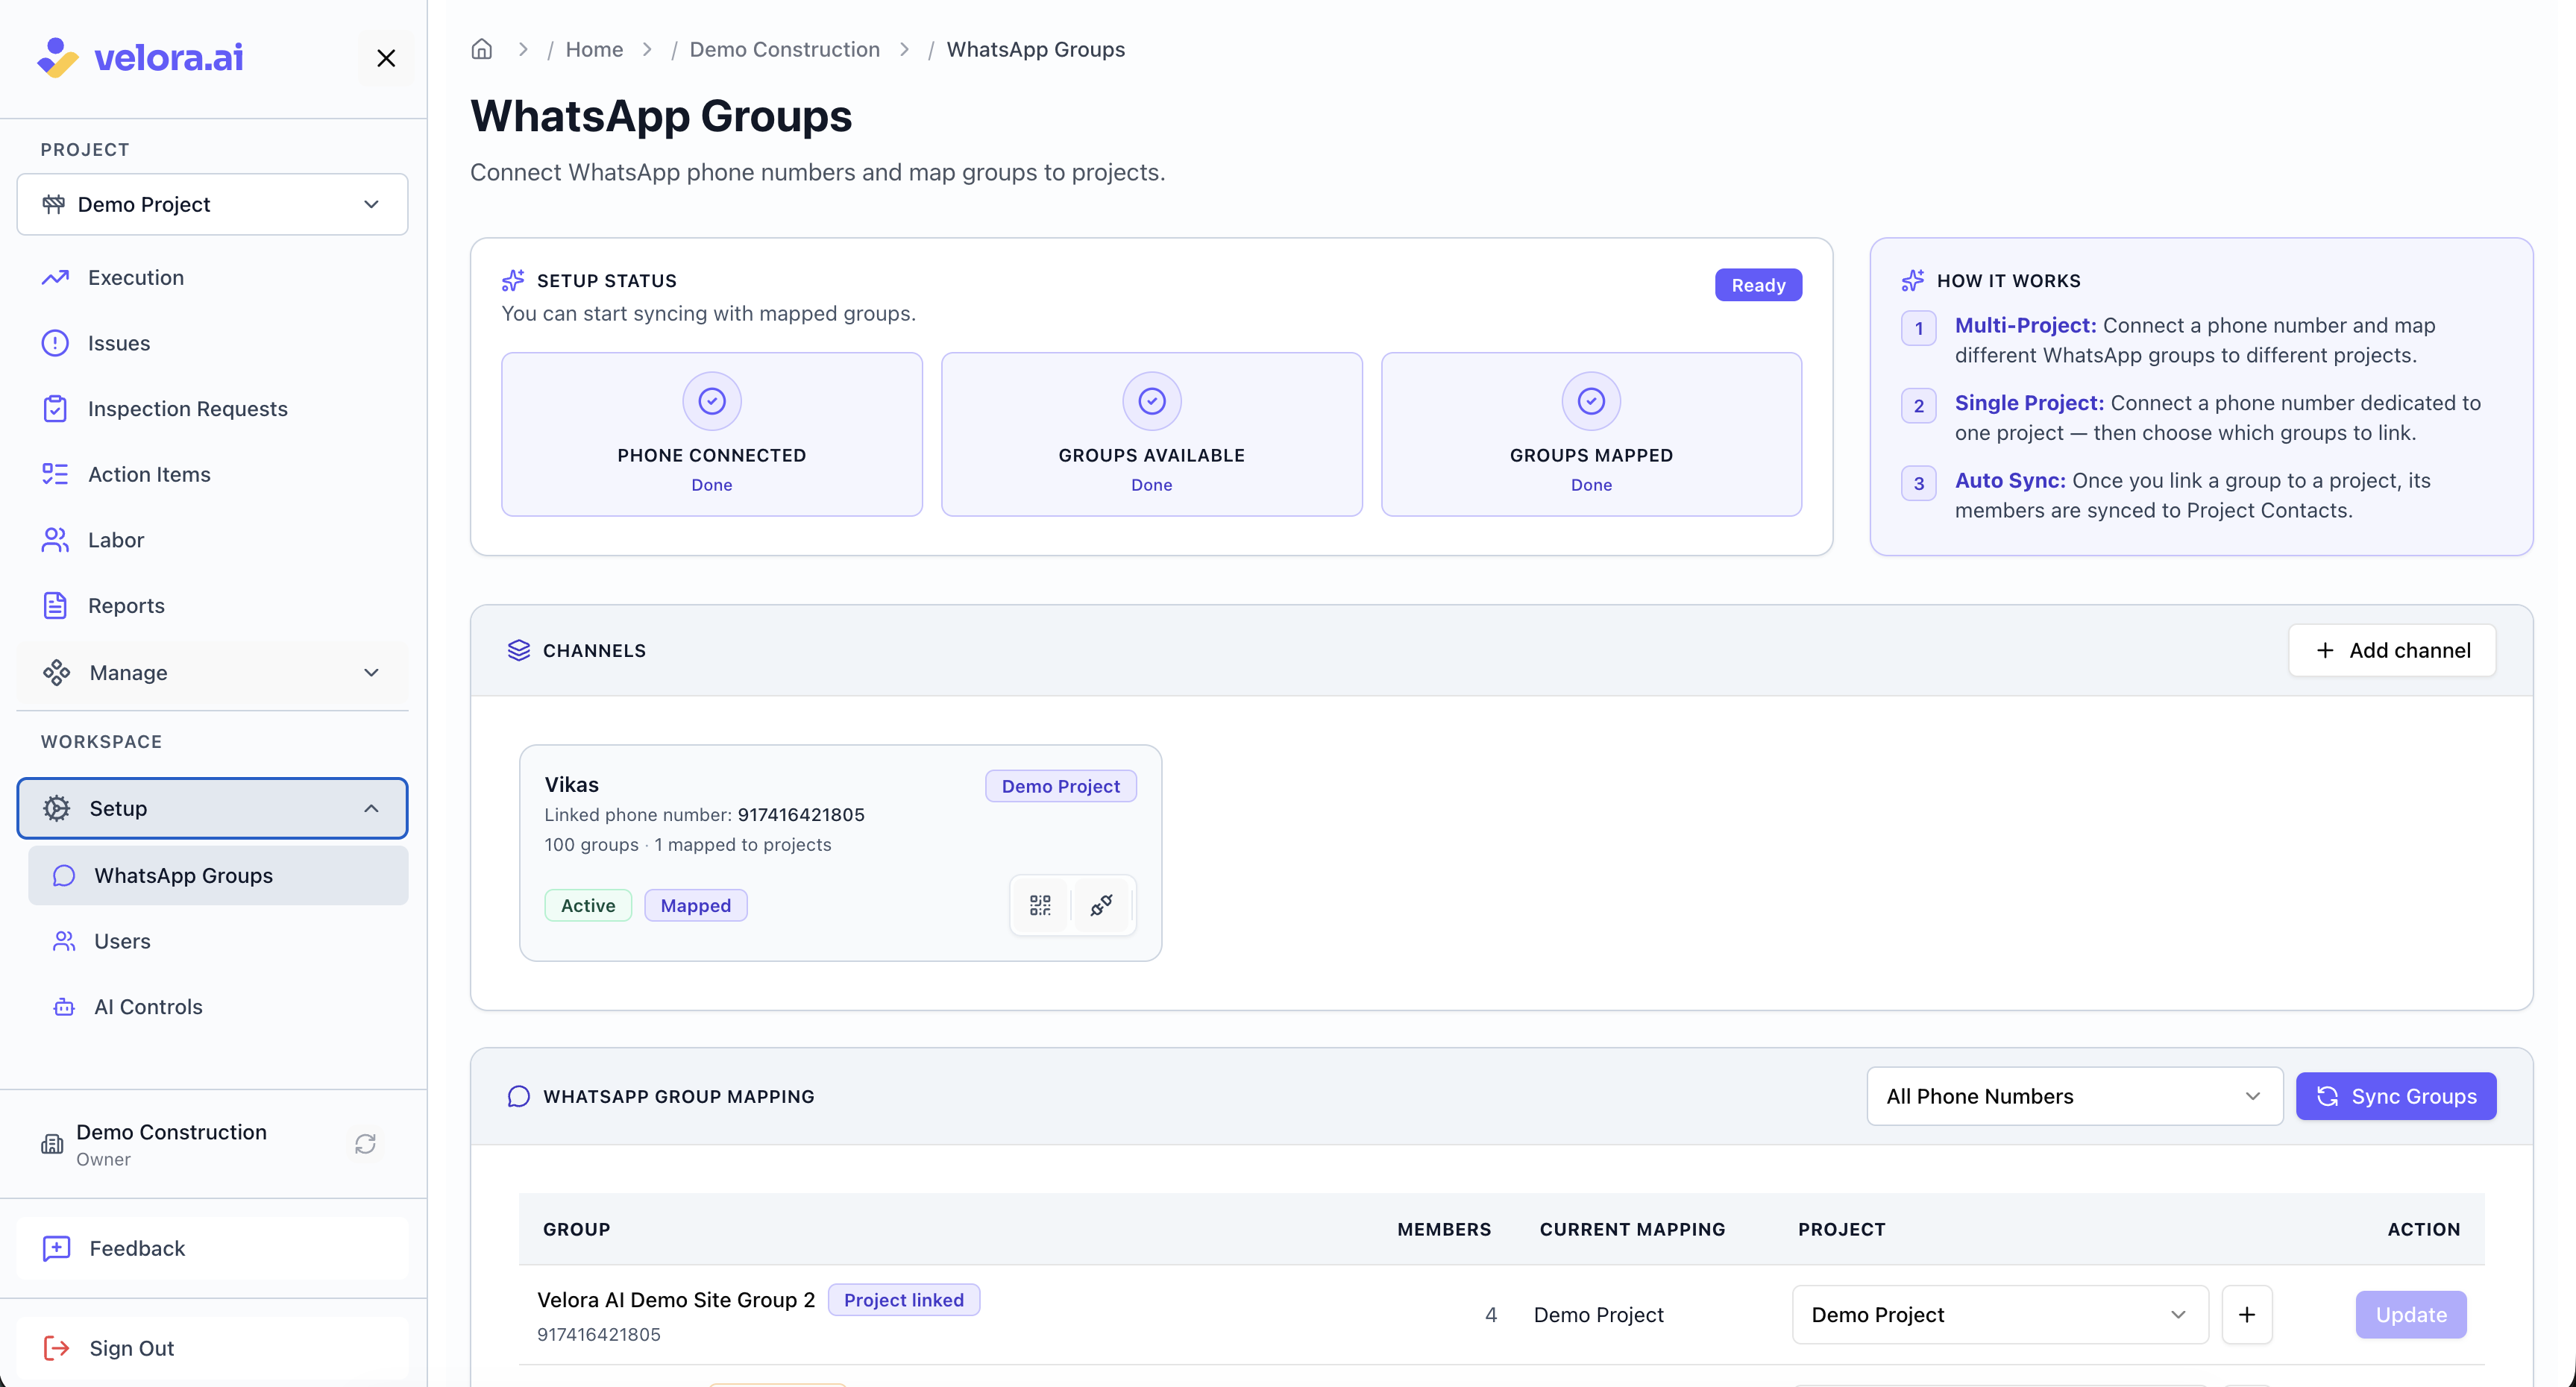
Modifying your WhatsApp group setup
You can update your group mapping at any time from the WhatsApp Groups Setup screen inside the app — add new groups, remove old ones, or reassign groups to different projects. If you skipped the guided onboarding, this is also where you complete the initial setup.
Troubleshooting
I didn't receive the confirmation email
Check your spam or promotions folder. If it's not there after a few minutes, try signing up again or reach out at support@velora.ai.
QR code expired before I could scan it
Click 'Generate QR' to generate a new QR code, and scan using your WhatsApp account.
WhatsApp says "Too many linked devices"
WhatsApp allows up to 4 linked devices per account. Go to Linked Devices on your phone, remove a device you no longer use, and then try linking again.
A group I expected to see isn't showing up
Only groups associated with the connected WhatsApp account will appear. Make sure you scanned the QR code with the WhatsApp account that's actually in those site groups.
What's next?
Once your groups are mapped, Velora runs in the background. AI follow-ups and team reminders are delivered right inside the WhatsApp groups you mapped. Check the Velora app during the day to see live categorised updates and ready reports — all built from the messages your site teams are already sending.
Workspace owners and admins can enable or disable AI follow-ups and reminders at any time — so you're always in full control of what gets sent to your teams.
For help or questions, reach out at support@velora.ai.